How to Get Best out of your Digital SLR
We all love nature captured in its most beautiful form and nothing other than a digital SLR can serve this purpose better. Nonetheless, the fact seeming to be the most discouraging of all is after a fortune spent in owning a digital SLR, you discover to your horror that the snaps caught by your new DSLR are somewhat akin to the ones captured by any ordinary digital camera. But you must not feel disheartened as DSLR is more than just point and shoot with a stream of integrated features to enhance your skill of photography.
All the present-day cameras are well-equipped with an auto adjust function that helps you take pictures of good clarity, but in order to make the best out of DSLR, you must be familiar with certain simple facts and features relating to photography.
All DSLR cameras come with some basic features like optical zooming and digital zooming. An optical zoom is the actual zooming capability of a camera. It’s like holding a magnifying glass to the object so that it brings out more detail in the picture whereas digital zooming involves blowing up the image to some specific area. Digital zooming compromises with the quality of an image whereas optical zooming focuses on capturing the detailed image of an object without hampering the quality.

Regarding quality, the primary thing determining the storage quality of an image is the pixel. The image storage capacity of a camera depends on the pixel counts. If you want to print photos of size 5" x 7" or below, then 3Mp or 5Mp cameras are good enough. If you want to click good pictures with the intent of using them as posters or selling them professionally, then you require a camera having image storage capability over 10MP. Having said that, please note that pixel is not the only thing to determine the quality of a photo.
Sensor Size is another big determinant of image quality and noise .If I have two cameras of 10MP, then the camera with bigger sensor size will have pixel size greater than the other and so the image quality will be better and noise will be less than the one with small sensor size.
Sensitivity is another aspect worth mentioning. Sensitivity is usually measured in ISO terms. The larger the range the more capable your camera is in different light conditions. For example, a camera with ISO 100 to 3200 is less sensitive than a camera with ISO 100 to 6400. For normal night and day photography, an ISO of 100 -3200 will be sufficient. At present, we have digital cameras like Nikon D3s and Canon 1Ds with ISO sensitivity as high as 100000. It is the sensitivity of light that matters. General thumb rule is one should use a high ISO setting for shooting indoor or during the night whereas a smaller ISO setting is good enough for daylight photography.
Now moving on to capturing the pictures, it is advisable that you should use the standard modes including auto, portrait, landscape, fireworks etc if you are not comfortable with the functionalities of your camera. However, as and when you become comfortable, it is recommended that you start using manual mode more frequently. This is the mode that will provide a completely different approach and dimension to your photography.
Any camera is like a black box with a hole. The hole determines how much light enters the camera and strikes the sensor for getting a photo. Too much or too less of light will spoil the photo quality. Two parameters which control the amount of light entering the camera are aperture size and shutter speed. Aperture size is nothing but the size of the hole. You can reduce it or make it larger. A higher aperture number means small hole size. For instance, if you want to shoot a portrait, use an aperture which is on the bigger side (say between f/2.8 to f/3.4) to get a good focus on the subject. However, if you wish to take an image of a landscape then you should use an aperture smaller in size (say f/20). Shutter speed, on the other hand, is the time for which the shutter will remain open. If you want to take a picture in low light condition then you must use slow shutter speed but if you are taking pictures of moving object in the dark then because of the slowness of the shutter speed, you may get a motion blur on the image. If shutter speed is too fast then the amount of light entering the sensor may not be sufficient and the image will appear fuzzy with white blotches.
You may be wondering why I am discussing two separate things that serve the same purpose of controlling the amount of light reaching the sensor. It is not only the amount of light that decides on a good image. For example, during the daytime if you want to take a fine picture of an object moving in front of you, then for getting a good focus on that object you may need an aperture bigger in size. However, a big aperture allows in more light and hence you may end up getting light more than is required for the image. To compensate that you would need to set the shutter speed high so that it only allows the required amount of light to enter. One more thing to keep in mind is that whenever you allow in less light to enter your camera, set the ISO setting to low.
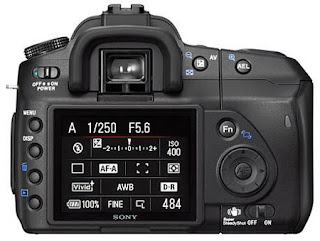
I understand that it might seem a herculean task for an amateur photographer to adjust shutter speed, aperture size and ISO every time they take a photo. There are less complicated modes available in most of the current SLRs. One is called the Shutter mode and the other Aperture mode. In shutter mode the expectation is that you will decide the shutter speed manually and the camera program will automatically adjust the aperture size. It is relevant for indoor photography. Suppose you are watching an indoor volleyball match where the only thing you need to worry is the shutter speed to acquire good shots of players while in motion .You need to set ISO speed also but that’s a onetime activity which you may set immediately on entering the arena. After you have reached the arena, look at the light available and set the ISO accordingly and forget it for rest of the night. Similarly, suppose you have gone on a vacation to Hawaii and want to capture some nice shots of the sunny beaches, then the only thing you should worry about is the aperture size to get the required contrast and focus. You should use the Aperture mode then.
Even if you know all those stuff I don’t expect you to set the camera correct every time you shoot. Even the best of photographers after taking photos check them out and then readjust accordingly to get a better picture. Now don’t waste anymore time reading articles. You go out there and start clicking.